Author: Zebulan

  • Looking Back on “The Creepy Cave” (SGZ Plays MC #3)

    Looking Back on “The Creepy Cave” (SGZ Plays MC #3)

    , the 3rd video on the SuperGeniusZeb channel was released. It was also the 3rd episode of SuperGeniusZeb Plays Minecraft, because that was the only series on the channel back then.

    And back then, I was trying to release an episode approximately every week. I managed to keep up this pace for a while, but pushing out episodes at that rate while also trying to make them decent quality isn’t easy, and so these days the episodes are pretty spread out.

    Like many of the early episodes, “The Creepy Cave” is kind of boring… not that much happens. Also like the first 2 episodes, I recently decided to do a re-edit of this episode to cut out a lot of the pointless, redundant, or particularly boring footage.

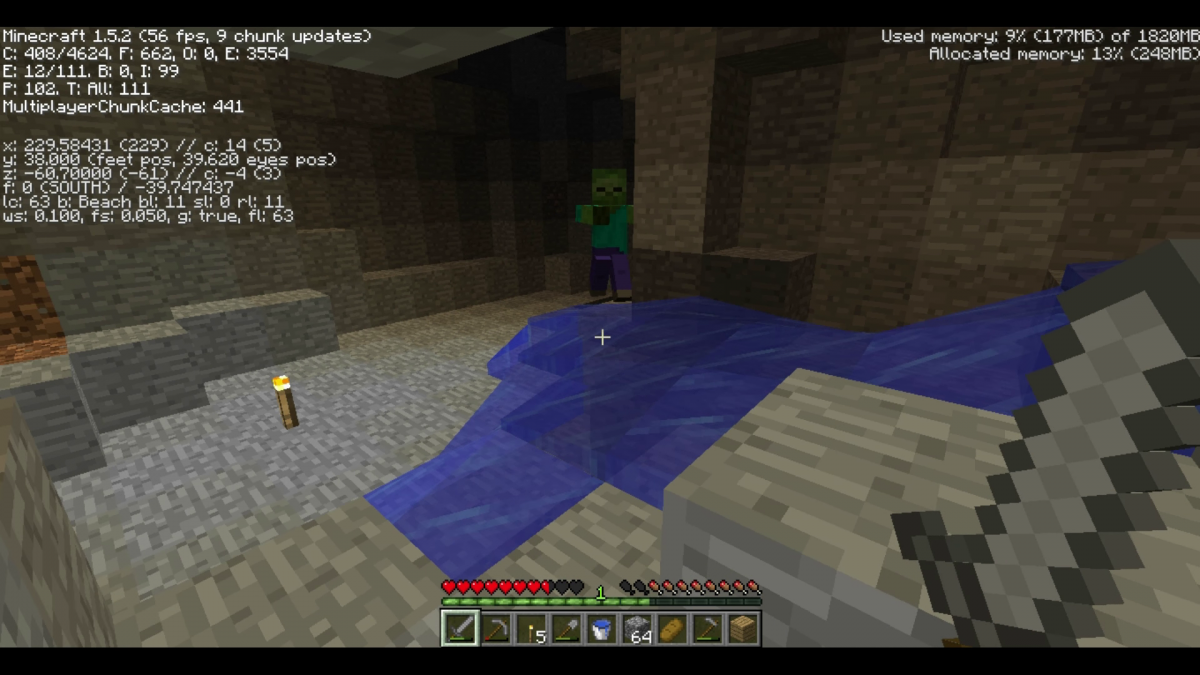
    “Creepy” might be a a bit of an exaggeration.

    Upon watching the episode while preparing for the re-edit, however, I was pleasantly surprised to see that I had already improved a great deal from the previous 2 episodes. It was still far from great, but it was a step in the right direction.

    For example, I had already learned to try and keep talking while recording, which along with my increasing use of cuts, helped to cut down on the amount of “quiet time”. I also didn’t have nearly as many goof-ups in my sentences, though I still made mistakes and sometimes trailed off or paused awkwardly during statements.

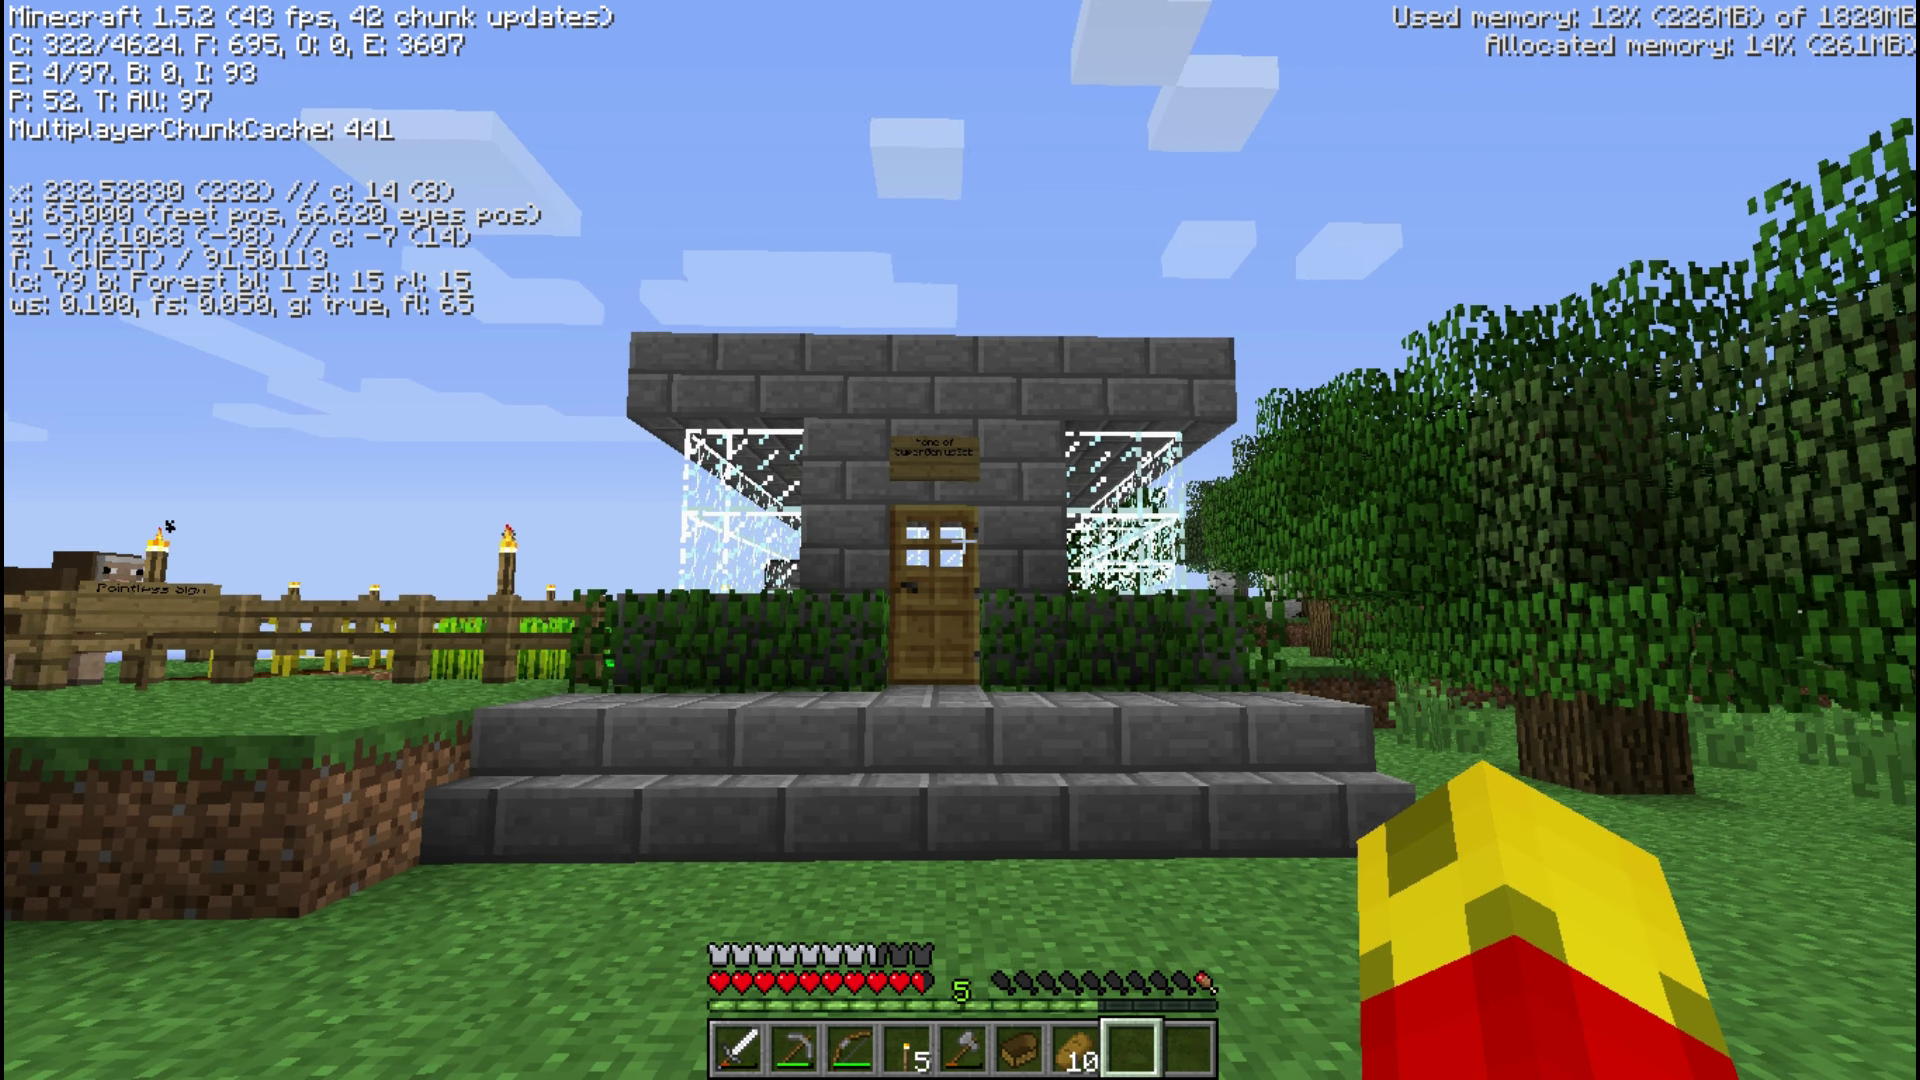
    This episode also features my first “clever/funny” intro. What does that mean? Well, having seen how some Minecraft YouTubers would often start episodes of their let’s play series with interesting situations and/or entertaining dialogue, I was inspired to do something similar. So, after I died after falling from a tree, I decided to make that the start of my episode, and integrate it into what was an early version of the greeting I now use in the start of all SGZ Plays Minecraft episodes.

    And speaking of intros, let’s talk about outros. Starting with episode 2, I decided to try and end every episode with music and a To be continued text overlay. this episode continues that plan. I ended up getting tired of doing that, though, so these days I just end most episodes with a hard cut… no fade out or music.

    One nice improvement from episode 2 is that the timelapses in this episode are shorter and aren’t long for the sake of playing nice music for a longer period of time. But as I said concerning the previous episode, I probably wouldn’t show the mining at all if I made this episode today. I was also still mistakenly calling the timelapses “montages” in this episodes, though I was already aware my terminology was probably wrong, so I was also calling them “sped-up segments” since I hadn’t figured out that the proper name was “timelapses” yet.

    In terms of content, this episode was again ahead of the previous 2, having more interesting content in less time (episode 3 was the shortest yet), such as game progression in the form of achievements and crafting my first armor, as well as some cave exploration.

    There was still a lot of footage that probably should have been cut, though. Collecting my items at the start of the episode should have had several cuts or been left out entirely, and keeping the footage of me going to the ravine was probably a mistake, since I ended up deciding not to explore it in that episode. As stated before, the timelapses were also pretty pointless, though in my opinion, they weren’t as boring as the ones in the previous episode.

    Overall, I think this episode turned out better than episode 2, which itself was better than episode 1. It’s nice to see that so far the quality of episodes has only increased so far. But knowing that episode 5, an episode with “Laggy” in the title, is coming up soon gives me doubt that this trend will continue indefinitely.

    If I remember correctly, extreme lag and the drops in framerate that came with it were some of the most persistent problems in the next several episodes up until episode 16, during which I finally figured out how to fix. But I’ll talk more about that when I get around to the re-edit of episode 5.

    And having mentioned re-edits, let’s talk about the re-edit of episode 3. This re-edit required the least amount of edits yet. There was a lot less yellow text thrown in, and I don’t think I had to make as many cuts in this one. I think this is partially due to the episode simply being better than the previous two.

    As for what I did cut out, I ended up removing both timelapses, and cut out most footage of me talking about information that was either redundant because I mention it in a previous episode, or unimportant and did nothing but eat up time.

    I would have cut out the entire clip of me being at the ravine, but I left some of it in because there’s some somewhat important exposition in there about how turning down my graphics settings helped reduce lag, and it also explains why I didn’t explore the ravine. (If I had made this episode today, I would have explained that while already at my house and starting to mine there. Actually, if I made this episode today, I probably would have actually explored the ravine, rather than back off from it.)

    Something interesting I noticed while editing this episode (and to a lesser extent, episode 2), was that because I had learned to keep talking during recording, it was harder to cut out footage. Often, the stuff I was doing on-screen wouldn’t be important or interesting, but I would be mentioning something that would be important later on, such as my plans for going to the ravine or underneath my house and stuff like that. Other times I would have difficulty cutting out some unneeded footage because I would jump into another sentence right after finishing the previous one, which is fine for getting information out, but made it difficult to make cuts that didn’t feel too abrupt.

    In the re-edit of episode 2, I ended up using a neat trick at the start of the episode where I cut at a clip of me turning around clockwise, and then cut to another clip later on of me turning around clockwise in order to skip ahead a bit to get to me explaining the plan for the episode quicker. It wasn’t a perfect cut, but I think it turned out pretty well. I actually missed it the first time I saw during a quick viewing of the intro while writing this blog post.

    I bring that up because I ended up doing another neat cut in the re-edit of episode 3. After collecting my first 3 iron ore blocks, I travel up the ladder from the mine to my house and talk about how I’ve now found 3 iron ore which is exactly the amount I need for a bucket… About 1 12 minutes later, I end up crafting the bucket while saying …I have enough of this iron to make a bucket. The stuff that happens in between is kind of boring and not really important, so in the re-edit, I cut the footage so that the first one is cut off and the episode cuts to the end of the second one, so it forms a complete sentence that it goes like this: I’ve now found 3 iron ore which is exactly the amount I need to make a bucket. I was really pleased with how this turned out… I think it actually feels like the cut was always planned if you haven’t seen the original version of the episode.

    The duration of the original version of the episode was , and the re-edit ended up being just . That’s a total decrease in length of . In comparison, episode 2 went from to , which is a difference of , and episode 1 went from to , which is a difference of . More was cut out of episode 3 than episode 2, but I feel like I had to do more editing work on the latter. And episode 1 required the most editing work of all.

    I’m curious to see how much time I will end up cutting from the next several episodes and how difficult it will be to re-edit those. I haven’t watched any of the early episodes since I first made them, so I don’t really remember exactly what happens in most of them. Doing these re-edits has given me an opportunity to go back and watch these early videos and see the progression of my video production skills over time. Because it’s been so long since I first made and released them, I don’t know how many of these episodes will warrant a re-edit, but I hope to finish and release re-edits of all the ones that do.

    As stated before, I think the original version of episode 3 was the best episode yet at the time, and I think that the re-edited version is the best of the re-edits so far. I look forward to working on the re-edit of episode 4, as well as the next entry in this blog post series. I hope you all have been enjoying the re-edits and these blog posts as much as I have enjoyed making them! Until next time, this has been SuperGeniusZeb, and I thank you all for reading.

    Watch the original version of “The Creepy Cave” on YouTube and LBRY!

    Watch the re-edited version on YouTube and LBRY!

  • Looking Back on “Obsessive Torch-Placement Disorder” (SGZ Plays MC #2)

    Looking Back on “Obsessive Torch-Placement Disorder” (SGZ Plays MC #2)

    Yep, this is now officially a blog post series. (Click here to see the first entry.)

    I could have done better with the title of this episode. I could have called it “Spider Ambush”, “The Mine”, “Mine Own Mine”, or even “Wandering with Half a Heart”. But instead I called it “Obsessive Torch-Placement Disorder”, a name which I thought was a funny joke based off of an odd moment near the end of the episode where I was being picky about where I placed torches on my newly-constructed fence around my crops.

    Looking back, however, the torch scene isn’t quite as funny, dramatic, or even as long as I remember it being, and I feel like the title is therefore not really very descriptive of this episode, and it also doesn’t really work that well as a joke.

    But title aside, episode 2 of SuperGeniusZeb Plays Minecraft is definitely an improvement over the last one… which was also the first one. (I guess the first became last and the last became first. 😋) This episode has my first timelapses (which I mistakenly kept calling “montages” in the episodes and their descriptions), which cut down on the length of the episode considerably. This, combined with me accomplishing a lot more in less time compared to the first episode, makes episode 2 a lot more enjoyable to watch.

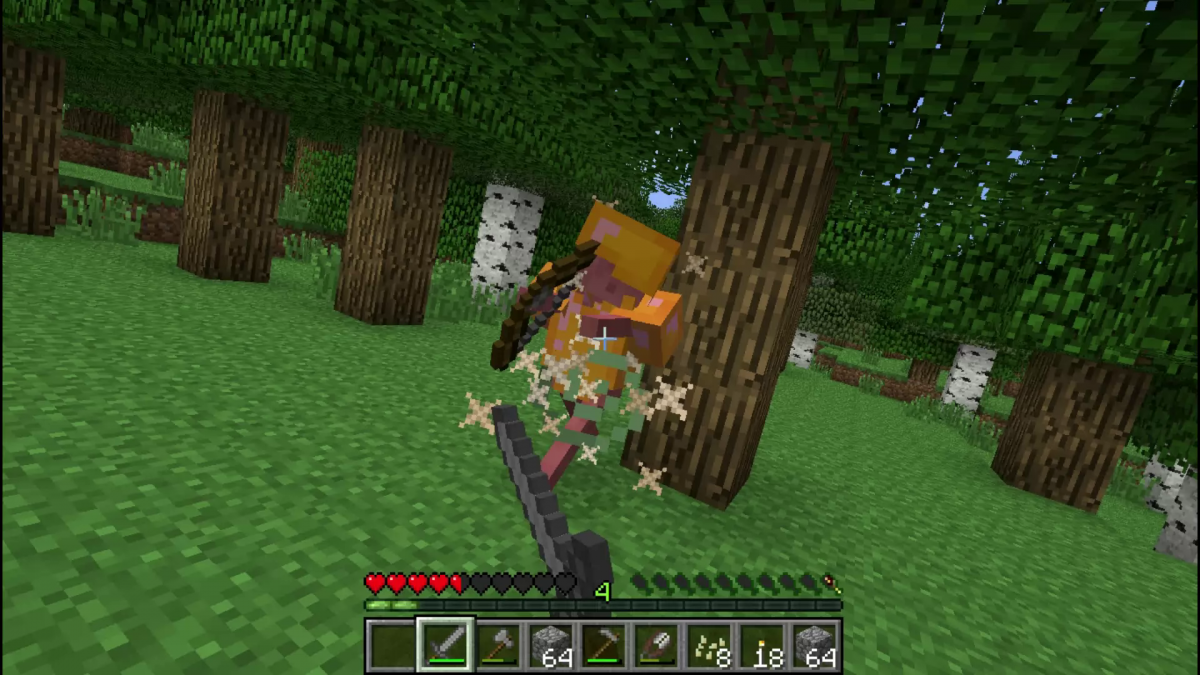
    When all else fails, you can probably make a cool thumbnail out of a part of the video where you’re fighting something.

    But a lot more enjoyable is a relative term that refers to episode 1. Can episode 2 stand on its own merits? I’d say that in its original form… no, not really. There’s still a lot of problems with this episode, though it’s definitely better than the one that came before it.

    The timelapses, while better than no editing whatsoever, are not as well-edited as they could have been, and sometimes they drag on for too long with too little happening to keep the viewer’s interest. The Kevin MacLeod music is probably the best part about them, but I made the mistake of limiting the speed of the timelapses so that more of the music would play, which was partially to blame for the aforementioned problem of the timelapses going on for too long.

    The lack of interesting things happening in the timelapses also contributed to the problem. It’s okay to have a timelapse with repetitive actions, but the timelapse has to be short so the viewer doesn’t lose interest. If your timelapse is long, there needs to be variety in the stuff happening on-screen. You can’t just mine a couple blocks, run up a ladder, craft some stuff, run down a ladder, and then do that same process over and over again and expect a timelapse to make it more interesting. The timelapse may greatly reduce the amount of time that the activity takes up in the video, but it won’t automatically make the activity twice as interesting or anything like that.

    If I had made this episode today, I probably wouldn’t have even used timelapses for the mining segments, unless I was going to do something special with Replay Mod, which doesn’t exist for Minecraft 1.5.2. Quick and simple timelapses for mundane actions are okay, but often you don’t even need them at all. Cutting to the end of a simple and repetitive action is often both the best move and the easiest move. If you’re going to do a timelapse or sped-up segment, it needs to either have a variety of things happen in it, or be pretty short.

    You can also try and do what I’ve seen Etho do in a lot of his videos: use a quick montage (as in an actual montage, not a timelapse) to show a series of key moments in a series of related tasks/actions, but don’t show the “empty” time or spend too much time on any particular action. Here’s an example of what I mean. It’s a great way to give the viewer a taste of what you’re doing, without lingering on it too long and eating up time in the episode, and also does it in a way that can be a lot more fun to watch. I’ve been trying to implement some of this quick montage style stuff into my recent videos, including the re-edits of my old videos.

    And speaking of re-edits, I have uploaded the re-edited version of SGZ Plays Minecraft episode 2 to LBRY and YouTube, so make sure to check it out if you’ve been wanting to watch through the entirety of SuperGeniusZeb Plays Minecraft but don’t want to waste a lot of time watching all the boring parts… or if re-edited versions of old videos just happen to interest you.

    Side note: with the episode 2 re-edit, I made sure to set the project framerate in Kdenlive to 60 fps, so this re-edit is the same framerate as the original, unlike the episode 1 re-edit, which had a framerate of 29.97 fps. No, I can’t just change the framerate in the project settings and re-export the episode 1 re-edit. Unfortunately Kdenlive doesn’t handle project framerate changes very well, and all the titles, effects, and transitions got messed up.

    This re-edit trims the time down from about to … it’s not as much of a length reduction as episode 1 got in its re-edit, but that’s because episode 2 didn’t have as much dead time, and it was also shorter than episode 1 in the first place. I could have saved a bit more time if I had cut out some of the timelapses, but since not much else happens in the episode, and since they were the first timelapses I ever did, I decided to keep them and go the route of adding yellow commentary text to the longest and most boring one.

    One of the things I noticed while rewatching and re-editing this and the first episode was that I used to be a lot more dramatic in expressing my frustration at certain things. Situations, which, in hindsight, weren’t really that annoying. These days I would probably just laugh at something annoying, and maybe take a deep breath and sigh or something. But in these early videos, I seemed to get almost angry at the situation. I was actually surprised by how loud and frustrated I sounded during a couple parts of episode 2.

    In the re-edit, I decided to cut out some of these moments, because they sounded kind of whiny and annoying, and most of them were from unimportant parts of the episode that probably would have been cut out anyway.

    I’m not sure whether I was really as frustrated as I sounded, or if it was just part of the way I talked during recordings back then. I know I tried to speak louder than usual during recordings so my voice could be heard, so maybe that was part of the issue. Whatever the case, these moments definitely weren’t very enjoyable parts of the episode for me, and I doubt other people would want to listen to them.

    In addition to trying to reduce the amount of annoying moments in the episode, I also tried to add in a bit of humor in the re-edit using the yellow commentary text, as well as using the magic of video editing to make a certain silly moment even sillier. I think it turned out quite well.

    Looking back, I’ve realized that the main premise of this episode would probably only take up about 2 minutes in a modern episode of SGZ Plays Minecraft, and that alone says a lot about how different my new videos are compared to my old ones. I can also see how I was already trying to improve upon the shortcomings of the first episode, as well as how much more I still needed to improve.

    And I still have much to improve upon even to this day. You’re never done learning, and I’ve learned that making good videos takes practice, an understanding of what is interesting, what isn’t, and also how to use editing to shape your footage into something that is enjoyable to watch. My old videos served as practice that helped me to make better ones later, and watching my own videos and those of others helped me to learn more about the art of video editing and knowing when to stop recording. And now my latest videos will serve as practice for the ones that come after them, and I hope to continue learning more about making videos, so that my content will continue to improve.

    I hope this blog post series will be interesting and/or helpful to anyone reading it. Perhaps if you are just starting out with making videos then these posts will help you avoid some of the mistakes I made. I certainly hope so. Until next time, this has been SuperGeniusZeb, and I thank you for reading.

  • Looking Back on “The Demo World” (SGZ Plays MC #1)

    Looking Back on “The Demo World” (SGZ Plays MC #1)

    So this might end up being a series of posts on my blog where I talk about various videos that I have made. Or it could just be a one-off thing. Who knows? I sure don’t right now. I just started writing this initially as an updated description for the video on YouTube and a certain other site that you’ll hear about soon… but anyway, here’s my thoughts on “The Demo World”, the first episode of my main Minecraft let’s play series.

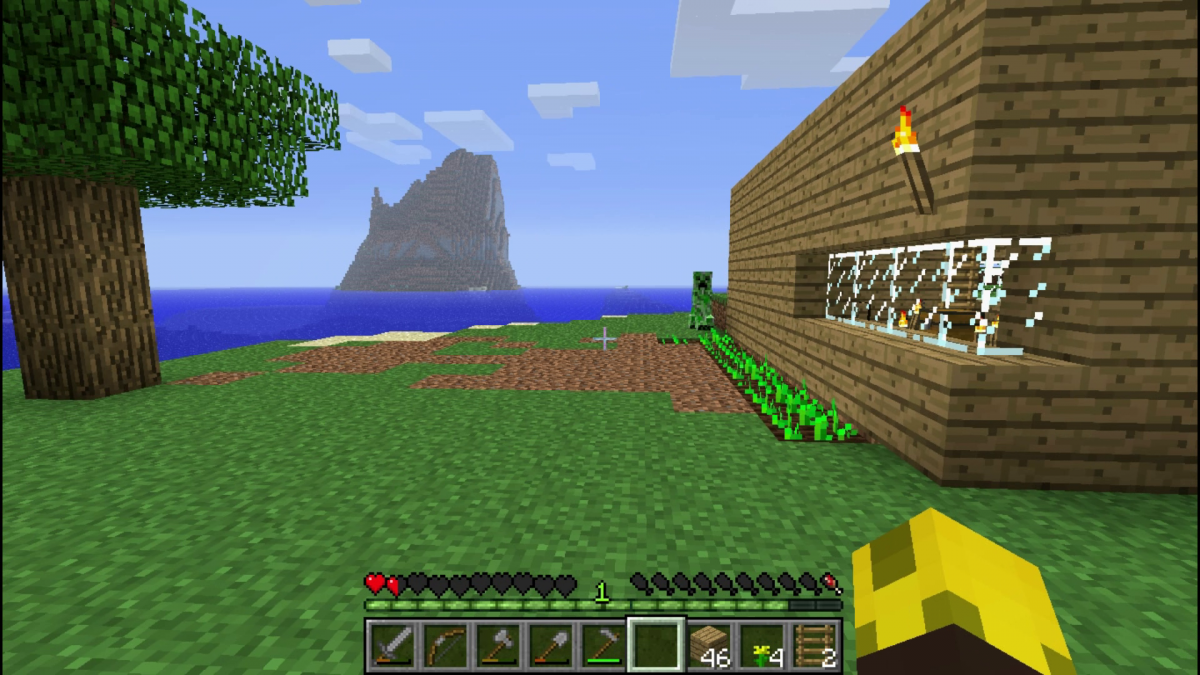
    This picture pretty much sums up the episode in general.

    Ah, the first episode of SuperGeniusZeb Plays Minecraft. This was the first video I ever uploaded to the SuperGeniusZeb channel on YouTube, and my first time doing a let’s play of a game in which I spoke. Back then, I had basically no experience doing this sort of video. All I had ever done before in terms of gaming videos were silent recordings (not even text/caption overlays) of LEGO Legends of Chima Online & LEGO Minifigures Online, which in hindsight weren’t very interesting at all, except as historical footage of those games, both of which have been shutdown. This was my first real attempt at a traditional let’s play.

    And being a first attempt, it wasn’t really that good. I mean, it could have been worse… but it also could have been much better. Since making this first episode, I’ve learned a lot about making gaming videos.

    For one, I’ve learned that if you aren’t talking at the moment, you better be doing something interesting or using timelapses and cuts. This episode has a lot of moments where I’m not talking, and all I’m doing is walking around and placing/breaking a couple blocks.

    Another thing I learned was to close the door to my room when recording, in order to reduce the chance of background noise from other people in the building ending up in the audio of my recording. Telling everyone you’re about to record is also very important and something I really wish I had done when making this episode.

    In terms of editing, this first episode has almost none. There’s the episode title overlaid on top of the end of the intro, the cross-fade of both of those into the first recording, a messed-up clock wipe to the second recording, the To be continued… text and fade-out at the end… and that’s it. I didn’t bother to edit out anything, and because of that, this episode is both full of boring moments and much longer than it should be.

    I’m currently working on a sort of “special edition” of this episode – I’m basically cutting out all the really boring stuff, turning some parts into timelapses, and adding some text overlays for the purpose of correcting some incorrect info I said, adding some fun bits of trivia, and introducing a bit more humor into the episode. The original version will remain on YouTube, of course. I intend to do this for most if not all of the early episodes of SuperGeniusZeb Plays Minecraft, with the goal of trying to make these earlier episodes more enjoyable to watch, and closer to the same level of quality as the later episodes. Of course, I can’t fix everything about them, but at the very least I can try to make them better than before.

    On another note, it’s kind of fun to notice just how much I was planning ahead in this initial episode. I had not yet come up with the specific idea of the Update-o-Matic, but I did know that I wanted to make version updates big and intentionally over-dramatic events. I also had plans for some other things as well, some of which have yet to come to fruition even now. You know that weird moment where I rhetorically ask what kind of series this would be and then answer with “everything”? That was a bit of a weird way of saying that I wanted the series to be both a normal let’s play (like most of it has been for the past couple of years) and also have story elements and stuff that you would expect to see in a series like Zisteau Plays Minecraft… which was actually one of the series that inspired me to make this one, along with Etho Plays Minecraft and Stampy’s Lovely World. So far, the closest thing to story elements in SGZ Plays Minecraft has been the Update-o-Matic shenanigans, but I’ve been planning a lot more than just that… there’s been some subtle hints in a couple of the episodes to one of these other things, but I won’t spoil just what. You’ll just have to wait and see…

    In case you were wondering what tools I used to make this first episode, I used Fraps to record the video and VSDC Free Video Editor to edit it.

    I probably wouldn’t recommend using Fraps today since it costs money and OBS, a free (libre) and open-source app for both livestreaming and recording, can do the same job for free and it runs on Linux and macOS as well as Windows. Windows 10 also has the Xbox Game DVR feature built-in, so you can use that to easily record stuff as well. Both OBS and Xbox Game DVR can record UWP apps and record the entire screen, whereas Fraps is limited to stuff rendered using DirectX or OpenGL that isn’t run in a sandbox like UWP.

    I also wouldn’t recommend VSDC Free Video Editor. It’s been a long time since I last used it, but when I was using it, it would crash constantly, and I was always saving my project every couple of minutes in case of a crash. (Actually, maybe the constant crashing was part of the reason why the earlier episodes didn’t have as much editing done on them as the later ones.) It was also pretty limited in what it could do. These days, I use Kdenlive, a free (libre) and open-source app that is a lot more stable, has a lot more features, and runs on not just Windows, but also macOS and Linux.

    Looking back, I wish I could have done better with this first video. But I also understand that making this video and the ones that followed were the practice that I needed in order to get better. I was able to look back on the episodes, figure out what I did wrong, and try to do better on the next one. To me, this episode serves as a reminder of just how far the series has come, and also how far I’ve come. I’m definitely not as good at video production as I wish I was, but I’m a lot closer than I was when I made this first episode, and I hope I will continue to learn and get better as time goes on.

    I don’t know how many people watch SGZ Plays Minecraft. There might not even be any. But for now, I will keep the series going regardless, in the hopes that it will entertain people. To all those who have watched the series, or any of my videos for that matter, and to all those who have provided feedback, whether it be a detailed comment or just a simple like/dislike… thank you.

    This has been SuperGeniusZeb, and I will talk to you again in the next video… or blog post. 😉

  • Mojang announces Minecraft Better Together Update at E3 2017

    Mojang announces Minecraft Better Together Update at E3 2017

    Preface

    For a school project, I had to write an article in the style of a news story. The topic I chose was one I knew a lot about: Minecraft. More specifically, I wrote an article about Mojang’s announcement of the Better Together Update for Minecraft (Bedrock).

    One of the things I’ve noticed in the Minecraft community has been a bit of confusion as to the specifics of the Better Together Update and what it actually is. Knowing this, I tried to write this article as if I was trying to explain the whole thing to someone with only a limited knowledge of Minecraft… someone who didn’t keep up with all the news and updates and/or didn’t know the technical details of Minecraft on various platforms (such as the multiple codebase situation). I tried to explain all the most important details in a way that would make sense to someone who had played Minecraft but wasn’t a complete expert or nerd about it.

    As instructed for the project, I also tried to follow the standard guidelines for what is considered a “news story”: use a lead with the facts listed in order of importance, use only facts in the article and not insert my own personal opinions/ideas, and try to keep the article focused on the subject… only diverging when necessary to explain something important, and so on.

    After writing this article, I decided it was good enough to post here on my website, both to serve as a quick reference for any time someone asks about the update, and also because I don’t like spending lots of time on a project and then not making good use of it. Because this version of the article is on the web, I’ve had the opportunity to add some pictures that I had previously made for illustrative purposes, which should make the article even more informative.

    Also, yes, I know the update appears to have been delayed until fall, but this article is supposed to be written as if it were made shortly after the announcement had actually happened, so I won’t bother changing it.

    So without further ado, here’s the article in its entirety! Enjoy, and let me know in the comments what you thought of the article.

    The Article

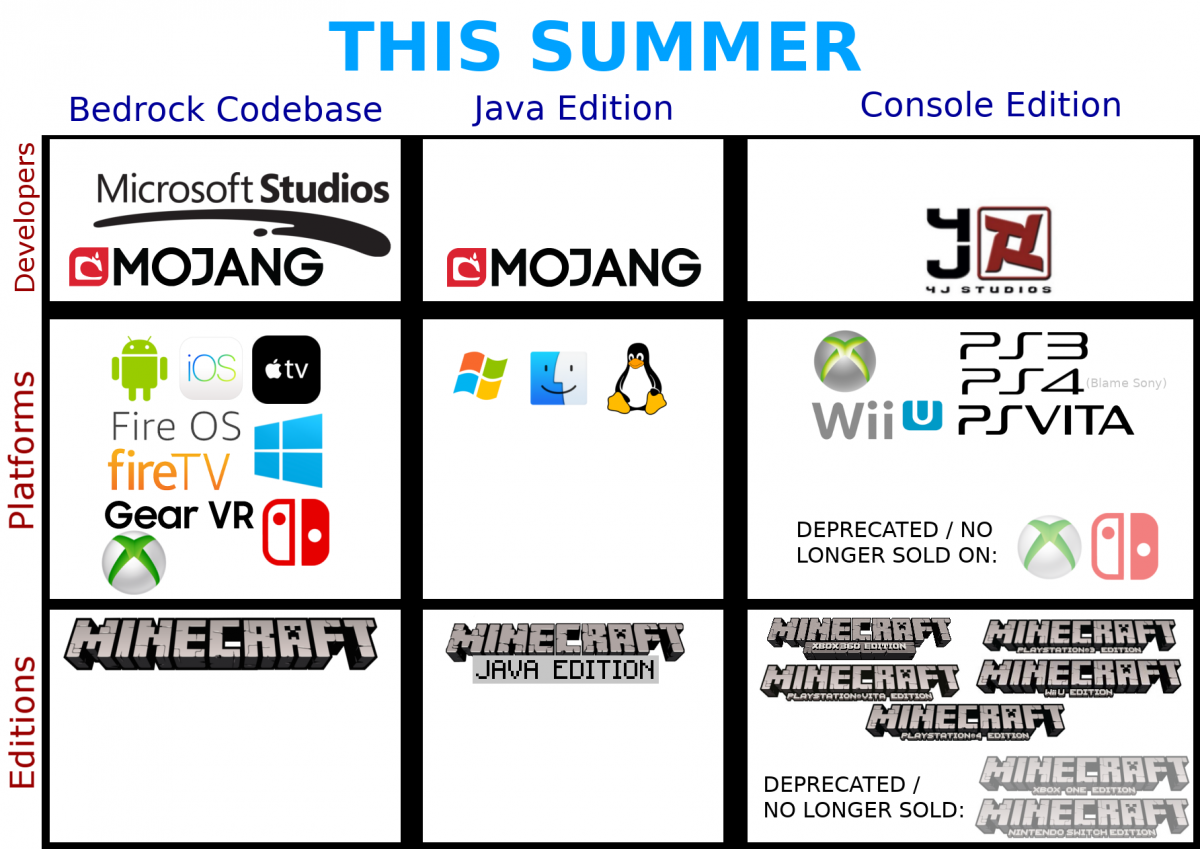
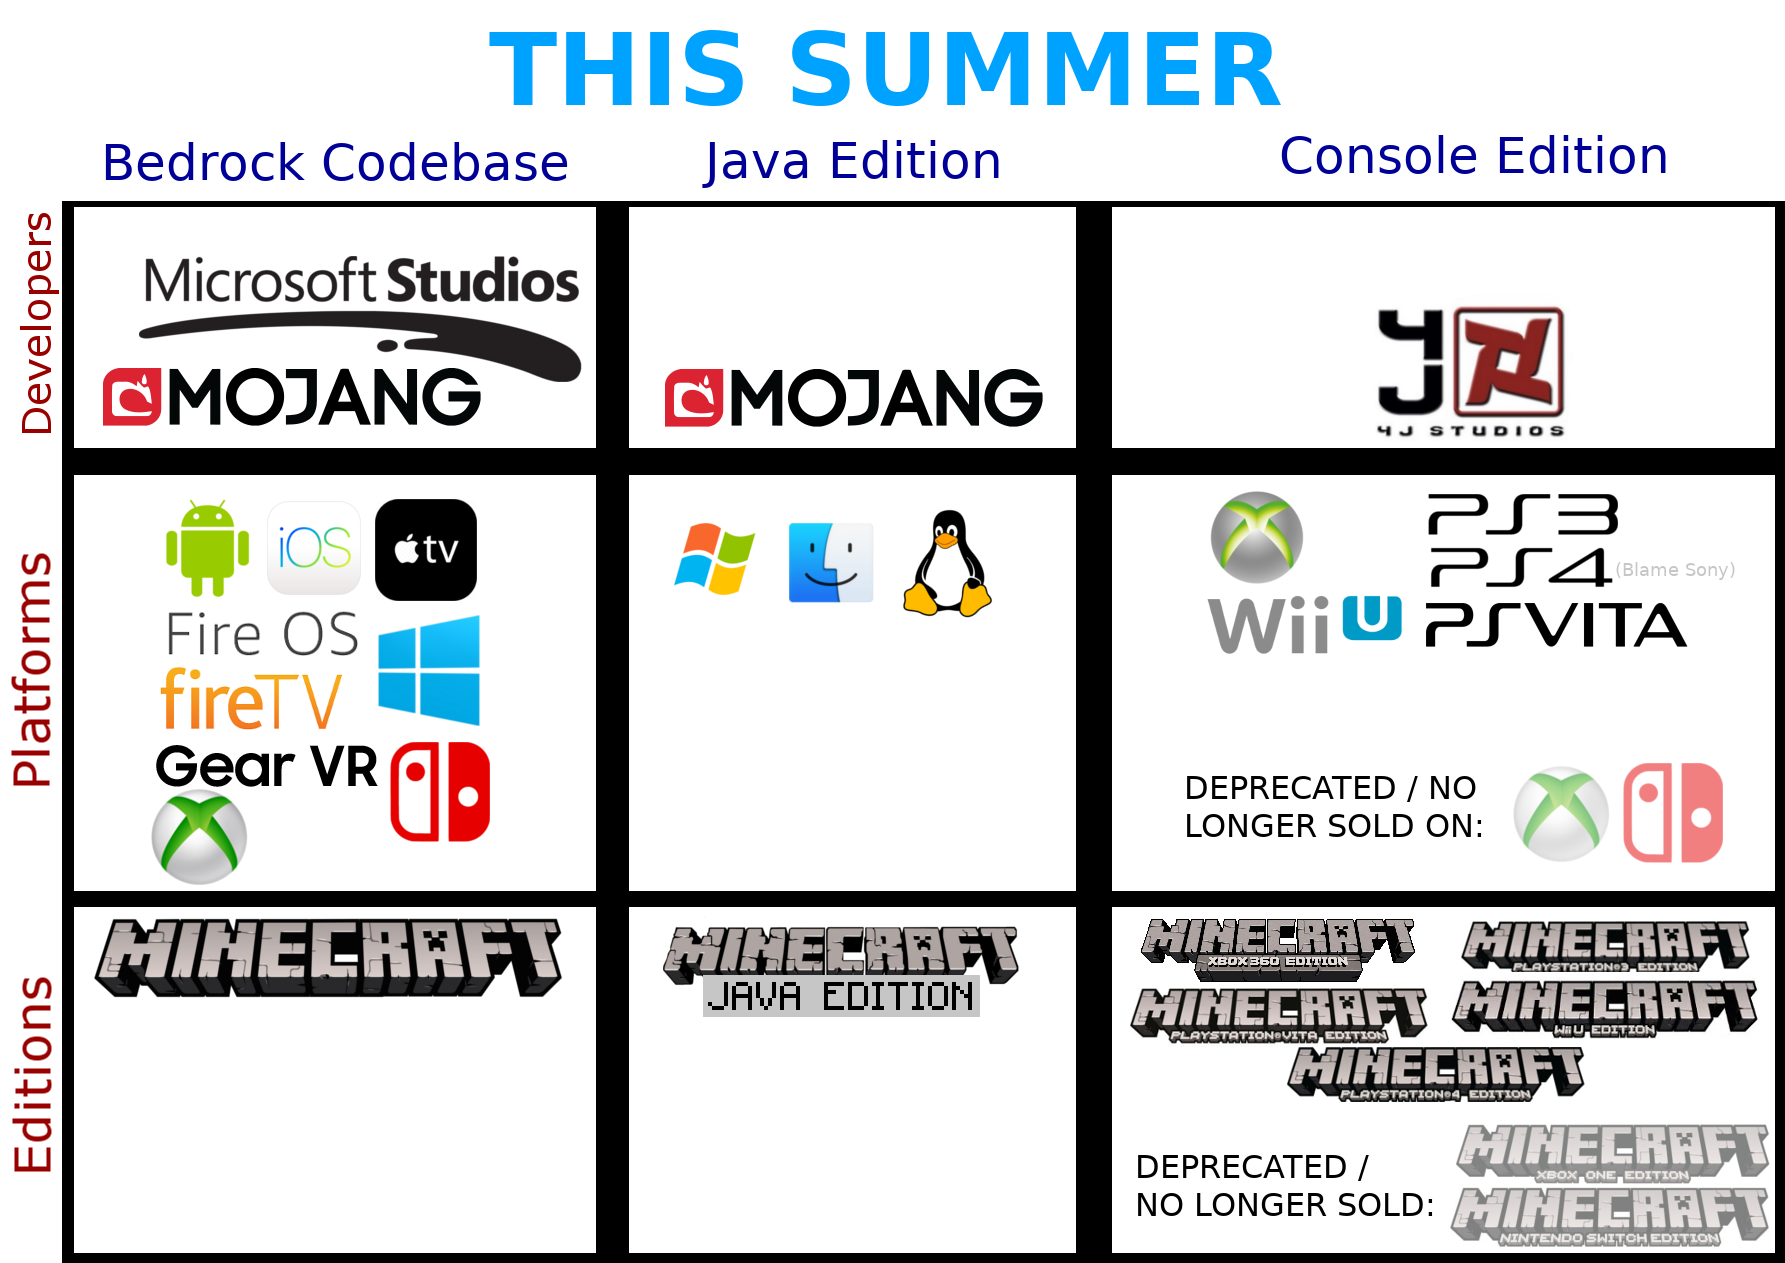
    A major update to Minecraft bringing cross-platform play, 3rd-party servers, Realms, and the Marketplace to Xbox One and Nintendo Switch was announced by Mojang and Microsoft Studios at E3 2017. The update, titled The Better Together Update, is planned to launch this summer on all Bedrock Engine platforms.

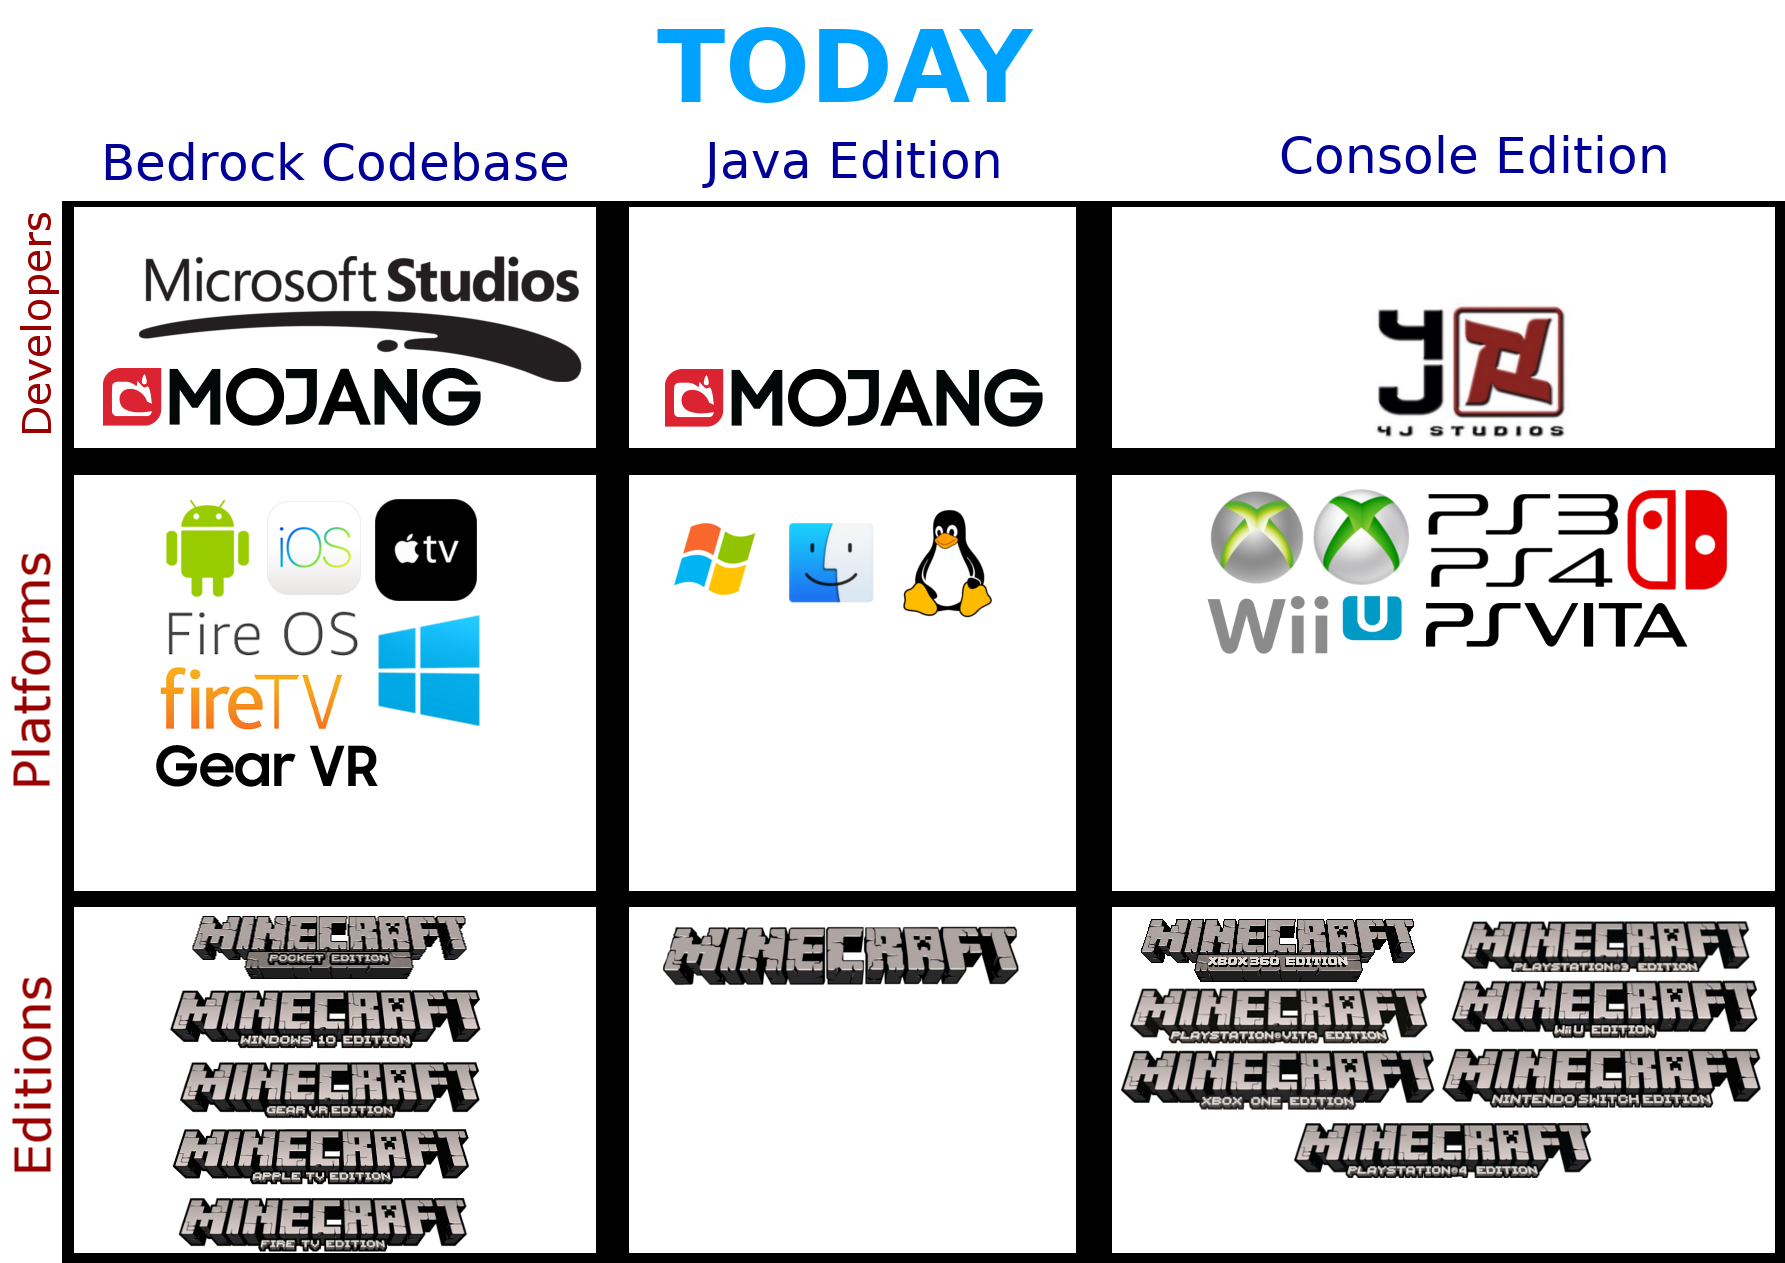
    To be clear, the update for Xbox One and Nintendo Switch is not actually an update to the version of Minecraft already on those platforms, but rather a separate version entirely called the Bedrock Engine (or Bedrock Codebase), which is being ported to the Xbox One and Nintendo Switch this summer.

    The Bedrock Engine is the version of the game which already runs on Android, Apple TV, Fire OS, Fire TV, Gear VR, iOS, Windows 10, and Windows 10 Mobile. The Bedrock version of the game allows players on all of its platforms to play with each other via LAN, 3rd-party servers, or Xbox Live. This version of the game is being ported to Xbox One and Nintendo Switch and will allow the same freedom of cross-play via Xbox Live, though unlike all the existing platforms, online multiplayer on Xbox One or Nintendo Switch will require a subscription to Xbox Live Gold or Nintendo Switch Online, respectively.

    The current version of Minecraft on consoles is called Console Edition, and is developed by 4J Studios, unlike the Bedrock Codebase, which is developed by Mojang and Microsoft Studios. The Console Edition consists of Xbox 360 Edition, Xbox One Edition, PlayStation 3 Edition, PlayStation 4 Edition, PlayStation Vita Edition, Wii U Edition, and Nintendo Switch Edition. Despite running the same core code, none of these editions have cross-platform play with each other (except PlayStation 3 and PlayStation Vita).

    Owners of the Xbox One Edition or Nintendo Switch Edition will be able to download the new Bedrock Engine port for those platforms for free, and will still have the ability to play the Console Edition version if they so choose. Players will also be able to transfer and convert worlds over to the new Bedrock versions of the game, and most DLC is also planned to transfer over as well. Additionally, 4J Studios will keep providing updates to the Console Edition codebase on all platforms, including Xbox One and Nintendo Switch.

    Various features that have been present in Console Edition but absent from the Bedrock codebase are being ported over in The Better Together Update (also known by its version number: 1.2), allowing for world conversions from Console Edition to work without data loss. Conversely, the introduction of the Bedrock Engine on Xbox One and Nintendo Switch will also give players on those platforms access to features that have existed on the Bedrock platforms, but not Console Edition, including the aforementioned cross-platform play via Xbox Live and access to 3rd-party servers.

    Another one of the Bedrock Engine features that Xbox One and Nintendo Switch players will now be able to access is the Marketplace, an in-game store that allows players to not only purchase official resource packs, world templates, and skin packs, but also community-made content, made by content creators who have partnered with Mojang/Microsoft to put their content on the Marketplace for sale – or for free, if the creator wants to give it away. The majority of DLC on the Marketplace is cross-platform, and tied to Xbox Live accounts, so players who purchase a Marketplace item on one platform will have access to it on all other platforms. (There are exceptions, like the Super Mario Mash-up Pack, which will only be available on Nintendo Switch.)

    It should be noted that free, custom, user-made content outside the Marketplace exists on all Bedrock platforms (except possibly Apple TV and Fire TV – we weren’t able to confirm about those). It is currently planned for custom content to be possible on the Xbox One and Nintendo Switch ports via some unknown method, though there is currently no guarantee that this will come to fruition. If it did, it would be the first time Minecraft players on any console got access to free, custom skins, add-ons, and world templates – up until now, they have only had access to non-cross-platform official texture packs, skin packs, and mash-up packs, in the Console Edition in-game DLC store.

    The Better Together Update is also introducing a “server browser” which will allow players to easily access a list of large 3rd-party servers that have partnered with Mojang/Microsoft without having to manually enter a server address.

    The update will also bring Minecraft Realms, Mojang’s always-online multiplayer world hosting subscription service, to Xbox One and Nintendo Switch for the first time.

    The Bedrock Engine was also planned to be ported to PlayStation 4 as well, but when approached by Mojang/Microsoft Studios, Sony declined the offer due to the requirement of Xbox Live being used for the cross-platform multiplayer, Realms, and Marketplace.

    The Better Together Update also brings a name change to the various Minecraft editions. All the Bedrock Engine-based editions (except the special Education Edition), will no longer have different names like “Minecraft: Windows 10 Edition”, “Minecraft: Pocket Edition”, etc. Instead, all of them will be renamed to simply “Minecraft”. The original version of Minecraft – the one written in Java that runs on Windows, macOS, and Linux – is being renamed to “Minecraft: Java Edition”, as it is being phased out of the position of being the “reference version”. (It will continue to be updated by Mojang as it always has, however, as it still has a place in the grand scheme of things, being the only version to run on macOS and Linux, and currently being easier to mod due to Java being a more “moddable” language, which has been taken advantage of by the well-known 3rd-party Forge API, which has been used by players to create thousands of mods for the Java Edition.)

    Mojang has also announced another update planned to come out in the fall, which will introduce various graphical improvements to the game (including 4K support), as well as an official resource pack DLC intended for higher-end devices called the Super Duper Graphics Pack, which will add higher-resolution textures and fancy shaders to the game, making the game look significantly prettier.

  • Another Story Begins…

    Another Story Begins…

    I’m putting those Bing Rewards credits I’ve got to good use. 😛

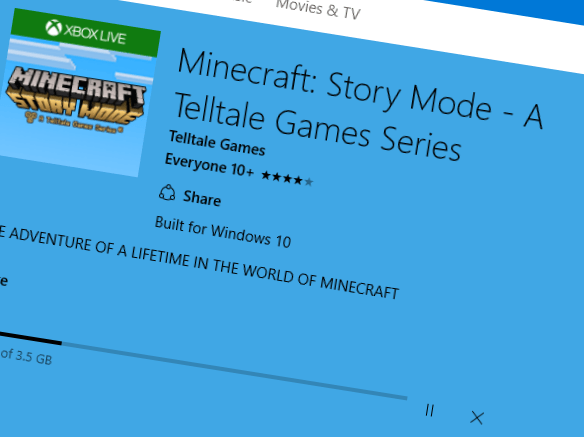
    I’ve been wanting to play this game for a while now, but I didn’t really have the money to spend. But over time I’ve managed to accumulate a whole bunch of credits on Bing Rewards, and they temporarily reduced the price of the Windows Store gift cards so I decided I’d go ahead and purchase it now. So get ready for SuperGeniusZeb Plays Minecraft: Story Mode… coming soon to a YouTube channel near you!

  • A Helpful List of Minecraft 1.9.4 Modding Resources

    If you’re a newbie Minecraft modder, you may often find yourself looking for some helpful article on a certain modding aspect, whether it be block states, JSON files, the OreDictionary, or whatever it is that you would like to know more about. Unfortunately, there isn’t really any central place on the internet that serves as a hub for all modding tutorials/articles/how-tos, and especially not for the latest version. This can be quite a problem, and it can make learning to mod rather difficult.

    Over the course of many days spent working on my mod, Colore, I’ve found quite a few good articles on various Minecraft Forge modding topics that should be pretty helpful if you’re just starting out or want to learn about a part of modding that you haven’t explored yet. I would like to point out, though, that you do need to have at the very least a decent understanding of how programming works, as well as some of the particular things about the Java programming language that are important to know. You should also already have an understanding of various basic Minecraft concepts like metadata, tile entities, chunks, and the distinction between blocks, items, and entities. So, here is my list of various helpful resources for learning how to make Minecraft mods. Some of these are tutorials, some are articles explaining how Minecraft and Forge work, and some are code examples. Most of these should be at least mostly up-to-date for 1.9.4, though several were written for older versions, so keep in mind that some things may have changed names and/or been revised to work in a different way since the article was written.

    The official MinecraftForge Documentation: While very short and not very extensive (and also slightly out-of-date as it hasn’t been updated much since 1.8), this is a good source of basic Forge info such as how to setup your development workspace, an explanation of the block states JSON formats, some guidelines for structuring your mod’s code, and some other helpful info for beginners.

    The Temporal Reality Modding Knowledge Base wiki: Here’s a really neat series of tutorials that should cover pretty much all the basics of modding in 1.9.4, as well as 1.8.9, should you decide to backport your mod to that version.

    Shadowfacts’ Forge modding tutorials: Another good series of modding tutorials. I would recommend reading both this and the above series to get two slightly different views on how to do the basics… remember that this is programming, and there are many ways to organize your code and accomplish the same thing. All the ways shown in various tutorials will end up calling the same Forge/Minecraft methods in the end, but it’s up to the modder to choose how to organize his code to do it in the most efficient, clean, readable, and modular way possible.

    Choonster’s description of the model-loading process: This is a very helpful article on how model-loading works as of 1.9/1.9.4, which is one of the main differences from 1.8/1.8.9, so this is a good complement to older articles/tutorials written for those older versions or to help modders who have coded for 1.8.x but not 1.9.

    GreyMinecraftCoder’s guide to how Forge works: Although it hasn’t been updated since 1.8, this is still a very very helpful resource (and still mostly up-to-date except for some method-changes/renames and some changes to model-loading in more recent versions) for understanding all basic Forge concepts like events, model/texture-rendering, how Forge runs your code, and various other important topics. Unlike most tutorials you’ll find online, this is actually more like a series of encyclopedia articles, actually explaining how everything actually works rather than just being a set of fool-proof instructions that don’t actually teach you anything.

    TheGreyGhost’s MinecraftByExample: A picture is worth a thousand words, and a mod full of example code for various kinds of blocks, items, tile entities, and more is worth a thousand questions. One of the best ways to learn how Forge and Minecraft code works is to study working examples and try and figure out how and why they work. (But don’t copy-and-paste, as you’ll learn nothing and you won’t progress in your understanding of modding at all.) This is a really great example mod that should help if you’ve run into a problem with your mod and you wish you had an example to study of something similar to what you want to do. It is currently written for 1.8.9, but will probably be updated to 1.9.4 soon.

    The Forge Forums: When all else fails, this is the go-to place for solving modding problems. Often you can find an existing topic already covering a problem you’re experiencing, and a quick search is generally all that is needed to find an answer to most problems you’re having. It’s also a good learning experience to just read the various posts that come up concerning various topics, as you can pick up a good bit of understanding of how Forge works simply by reading through past discussions. Finally, here are some helpful tips:

    • Whenever the game crashes, ALWAYS read the crash logs. 90% of the time you can find the exact line of code that is flawed by reading the crash logs, and you can easily discover just what exactly is crashing the game. Sometimes it’s trying to reference objects that haven’t been initialized yet, sometimes it’s trying to access info you don’t have access to, sometimes it’s doing silly things like trying to pass items as parameters to a function that takes blocks, but whatever the problem is, you can almost always find out what you’re doing wrong simply by analyzing the crash log and walking through your code to discover any logical errors you’ve made.
    • Don’t copy-paste code from tutorials. As tempting as this is, you should always take the time to read and analyze the code you see in tutorials so you understand HOW and WHY it works, so you’ll be able to do it on your own without constantly referencing a tutorial. Manually typing out the code can help you to remember how to do something and understand it better as well, as it causes you to think about the code more.
    • Study the Minecraft and Forge classes. Reading the source code is one of the best ways to learn how something works… not only in Minecraft modding, but in programming in general. You can often discover where functionality originates from and how to hook into and/or extend that functionality to use in your mod by simply looking around in the code for something similar to what you’re working on. For example, if you want to understand how slabs work, look at the BlockSlab, BlockHalfSlab, BlockDoubleSlab, and ItemSlab classes to see what they do, and try and figure out which methods you would need to override and which classes you would need to extend in order to make your own.
    • Before asking a question, make sure someone else hasn’t already answered it. For most basic modding problems, the answers are already on the Forge Forums on an existing topic, because chances are that someone else has already had your problem before. You don’t want to your time or other people’s time asking a question that you could have found the answer to yourself. Always check the Forge Forums and Google before asking for help, to make sure that the help you need isn’t already out there.
    • 95% of the problems you encounter in programming will be stupid little mistakes that will make you want to bang your head against a wall. Be prepared to search for hours and hours for the cause of a problem, only to discover it was all because of something silly like typing a “1” instead of an “i” or forgetting to actually call a method you’ve created. Try not to get discouraged, and take a break if your brain feels exhausted… a good night’s rest and a refreshed mind can help to solve many problems.

    I hope this post has been helpful to any new Minecraft modders out there! These resources have definitely been very helpful in my modding experience, and I hope they will be useful in yours as well!

  • Colore 1.1: Slabs & Future Plans

    Colore 1.1: Slabs & Future Plans

    Woo-hoo! After since the release of the Colore mod, I’ve finally finished the first update, which adds 70 colorful slabs to correspond with the 70 existing monochrome colored blocks already in the mod. The mod has been ported to 1.8.9 for this release, and will soon be released for 1.9 as well!

    Of course, some of you may wonder… why just slabs? What about stairs? Why did it take so long? Well, to answer those questions, I’ve been quite busy lately and I’d been struggling with figuring out how to get the slabs in the mod to work since I first released the mod and began work on the 1.1 update. I am still rather new to modding, and it took quite a while for me to wrap my head around how to implement the slabs properly… mainly how to make the half-slabs stack and make the double-slabs drop half-slabs. At the time when I first released the Colore mod, I thought adding slabs would be easy, but my knowledge of the Minecraft and Forge code was pretty limited and I got confused and lost very quickly.

    Eventually though, after several periods when I didn’t have any time to work on the mod and then got lost whenever I tried to start working on it again, and after staring at and observing the Minecraft code and doing some research for several hours, I finally figured out what I was doing wrong and figured out how to get the slabs working. I now understand metadata, block states, and slabs a lot better than I did before, and I’ve learned a good amount about modding in general, so (hopefully) adding stairs, fences, and etc. should be relatively easy, using what I’ve now learned.

    The Colore mod, as I’ve said in my previous blog post about it, is pretty much the result of me wanting to learn how to make Minecraft mods and be able to add pretty much any sort of basic thing like blocks, items, armor, entities, and so on. That’s why I chose to make a mod about colored stuff. It was a simple concept which could be applied to a lot of basic Minecraft objects. So where do I plan to go with this mod in the future? Well, I know there IS such a thing as a mod having too many features and being too bloated, so don’t expect colored-everything to eventually be in this mod, but here are the things I intend to add in the next update, update 1.2:

    • Stairs
    • Fences
    • Walls
    • Transparent blocks, slabs, stairs, and panes
    • Bows
    • Shields
    • Rebalancing of tools/armor for 1.9

    So assuming I don’t run into any annoying problems while coding, the next update should be a lot bigger than 1.1 is. I intend to release 1.2 for 1.9 and up, but not for 1.8.9.I don’t really feel like there’s a need to backport the mod to 1.8.9 as most other mods are already starting to come out for 1.9 (and soon 1.9.4) as the changes between it and 1.8.9 aren’t nearly as big as the changes from 1.7.10 to 1.8. The vanilla block states format also changed in 1.9, and I really don’t want to create around 100 block state .json files in the old format and then re-create them all for 1.9.

    As for what happens after 1.2 is finished, I intend to begin work on another update, called 1.3 (of course), and this would probably be the last update to add anything to the mod. The stuff I intend to add at this point will be some more difficult-to-code stuff, like colored liquids and glowing (light-source) colored blocks. I might also throw in transparent tools and armor, if I don’t wind up adding that in the 1.2 update. This update would be released for 1.9.4 (which Forge should be updated to by that time) and also 1.10 if that has been released by that time. Depending on how many significant changes there are, if any, in 1.9.4, I may also release that version of the mod for 1.9 as well.

    After 1.3, I’ll probably go on to work on other mods (a mod all about chocolate would be cool…), but I’ll continue to update Colore to the newest Minecraft versions as long as I can, and I’ve also considered making “expansion/add-on” mods for Colore, which could feature things like color-coded redstone components (with mechanics to make yellow redstone interact with & connect to yellowish-orange or yellowish-green redstone but not interact with or interfere with orange or green or blue or red… redstone? Red-redstone? Hmmm…), a Colore dimension with custom entities (because why not and because I want to learn about custom world gen and entities), or other things that are either big and complex enough to be put into their own mod, or too superfluous for most people to want them in the base mod.

    And so, being me, I’ve managed to take the very simple idea of a basic little beginner’s Minecraft mod that adds colored blocks… and then crank it up to eleven, turning it into a serious project that has tons of stuff planned for the future…

    And if you’ve read this far, I guess you must be interested in the mod, so what are you waiting for? Go ahead and download it and have fun! (Unless of course you want to play in 1.9, in which case wait a couple (hopefully) days and download the 1.9 version when I’ve finished porting the mod.)

  • What I Use to Make My Videos

    I’ll say it right now: This post will probably be very outdated within a year, and especially several years from the day I’m writing this, so to all you people from the future, click this link-that-will-link-to-the-updated-version-of-this-article-in-the-future.

    Quite recently, someone commented on the third episode of my StarMade series, asking what I used to record my videos. I enthusiastically began typing out an answer… a probably longer-than-necessary answer with lots of detail. While writing that comment, it occurred to me that I could make a blog post about it, and so for those of you wondering how I make my videos and how you can make your own YouTube gaming videos, here’s how I currently do it and what I would recommend if you’re going to do it.

    Equipment

    The computer I use to record, edit, and upload my videos (as well as everything else since it’s my only computer) is a Samsung laptop from around 2013 which was running Windows 8 initially, though I have since upgraded it to Windows 10. It has about 500 GB of hard drive space, 6 GB of RAM, and an Intel i5-3210M CPU with integrated Intel HD Graphics 4000. It handles Minecraft fairly well, though it can get laggy when recording and running other programs in the background. I intend to buy a much more powerful laptop in the future when I can afford it, but for now my current laptop serves me pretty well. If you’re looking for a gaming computer I would not recommend buying anything over 3 years old, and a dual-core i5 and 6 GB of RAM is about the minimum specs to have a comfortable gameplay-and-recording experience. For a very nice recording experience, I would recommend getting a computer with a recent i7 processor, a separate graphics card, and 8 GB of RAM. I don’t have very much experience when it comes to the different computer manufacturers, but so far Samsung’s products seem to be some of the best.

    I definitely don’t have the best of voice-recording devices, but right now I use a Logitech USB H540 headset (which costs about $30 on Amazon) for recording my voice in my videos. It has some annoying microphone problems, such as the volume level starting off quiet and then auto-adjusting and get louder as you continue to speak. I’m thinking about making a homemade noise filter for the mic to help fix some of the noise-popping, but at least it’s better than the headset I use to have, which was just utterly horrible. (Watch some of my earlier videos to see what I mean.) The speakers on the headset are pretty decent, though. If you’re going to make videos about playing games, always record the game while wearing a headset/headphones, so the game’s sound won’t be picked up by your microphone, as that just sounds terrible. To record the game’s sound, use software on your computer like Fraps or the Windows 10 Xbox Game DVR to record it directly, instead of placing a mic next to your computer’s speakers, like some beginners do. It’s a simple, but extremely important rule for videogame recording. In the future I want to buy a professional headset or separate microphone, thought at the moment I’m not sure which one I want, as I haven’t really done very much research on it yet. (If you know about any good ones, let me know in the comments!)

    For storing my videos, I quickly ran out of space on my computer (HD videos eat up disk space!), so I’ve started storing them on an external hard drive. I would recommend recording to an external hard drive rather than the main drive on your computer, as it frees up the main hard drive so it can handle other things (like saving your game files and other background processes), and helps prevent lag. I would recommend an external drive with at least 100 GB of space, as videos (especially uncompressed ones) just eat up tons of space, and you’re going to want to have enough space to last you for some time. I highly recommend keeping copies of your videos on an external hard drive, so you’re ready in the event that your YouTube channel gets hacked/taken-down and all your videos get deleted or something like that.

    Recording Software

    For recording games, I use the Windows 10 built-in Xbox Game DVR (which is free, assuming you are running Windows 10) to record my gameplay, or Fraps (which costs $37) if it doesn’t work with a particular game (such as StarMade). Both have the ability to record both the computer sound and my voice-audio at the same time, allowing me to not worry about recording both and then syncing them in editing. The Windows 10 Xbox Game DVR is built-in to the Windows 10 Xbox app, which, if I remember correctly, is pre-installed on new Windows 10 computers and newly-upgraded computers. (I would recommend going into the settings, turning on external microphone recording, and creating a custom keyboard shortcut for starting/stopping recording. I use Alt+R. (The default is Win+Alt+R.) It will record most things without a problem… in fact, you can even screen-record non-game things like your internet browser, for example. For some games though (such as StarMade), you may need to use Fraps instead as the Xbox Game DVR doesn’t seem to work with it, or at least not when you’re playing the game in fullscreen.

    Editing Software

    For editing, I use CyberLink PowerDirector 14 Ultra, which I got for a discounted price during their Thanksgiving/Black Friday sale . When I first started out I was using VSDC Free Video Editor, but the options on that program were pretty limited and it was rather buggy and sometimes frustrating to use. If you’re going to buy video-editing software I would recommend waiting until it goes on sale, especially holiday sales, as you can get the software for up to half-cost and sometimes get bonus free software (such as CyberLink AudioDirector 6) in my case. When recording footage with Fraps, you’ll want to convert the AVI video files it produces to a smaller and more compressed format such as MP4, using a program like Handbrake. If you set up the settings right, you can reduce the footage’s file sizes without losing hardly any quality.

    I hope this article was helpful to anyone looking to start their own YouTube channel and record gameplay videos!

  • Plans for My Current and Upcoming Series

    So I have several video series on my YouTube channel right now, with some getting episodes frequently, and others not-so-frequently. So for those of you wondering what is going to happen to the various series on my channel, here are my current plans…

    SuperGeniusZeb Plays Minecraft

    My first and favorite series on my channel, this vanilla Minecraft let’s play series will continue for as long as possible, and will probably only end if something unexpected happens or I run out of ideas for building stuff.

    Zeb & Ocky Play Tekkit

    With only one episode as of right now, this series looks like it might be canceled, but in reality I haven’t been able to play with Ocky much lately due to conflicting time schedules and such, but an episode 2 will come out once I have the chance to record it. As for how long the series will continue, I intend to at least go to the moon in that series before ending it, though if Ocky loses interest I’ll be okay with ending it earlier.

    SuperGeniusZeb Plays StarMade

    This series is relatively new, but I have a feeling it will last for a decent amount of time. Once I’ve established a good looking base and a really big, cool-looking spaceship I might stop playing for a while, but so far I’m really enjoying the game and want to play it more, so expect more episodes for weeks to come.

    1.9 Snapshot Showcases

    For obvious reasons, this series will end when 1.9 is released, but the Snapshot Showcases series will return when 1.10 snapshots start to be released… also for obvious reasons.

    SuperGeniusZeb Plays Minecraft: Windows 10 Edition

    As Windows 10 Edition becomes more and more like the Java edition, I’ve realized this series would become rather similar to the main Java Minecraft series, so I’ve decided to turn this series into a series of mostly livestreams on Twitch with the occasional progress-update/special-event non-live episode. I also deleted the world from episode 1 by accident, so the first livestream will be on a different world in which I haven’t really done anything yet, so this will be sort of like a series reboot after only one episode I guess. This series will also focus more on achievements and progressing through the game, unlike my more building-focused Java edition series, and may also feature my sisters guest-starring, as they have Pocket Edition on their mobile devices and therefore can play with me.

    Thought Dispenser

    The newest series on my channel, I really enjoyed making the first episode of Thought Dispenser, and I think this series will satisfy 2 problems I’ve had lately: my desire to freely express my thoughts and opinions on Minecraft stuff without annoying people by brain-dumping 30-minutes of overly-detailed and mostly-one-way discussion on them, and my need to find a way to do boring tasks like clear and ocean and strip mine for resources and do something interesting simultaneously. I intend to release episodes whenever there is a good Minecraft-related topic I know a lot about and think is worth addressing in a video.

    Redstone Contraptions

    So I made that one pig farm once… but in retrospect, I don’t really like the contraption. It’s rather unreliable and I’m still not sure whether or not the enchanting table is even necessary. But in the future, if I ever come up with another Redstone contraption (hopefully something more reliable), I’ll definitely make a video for it.

    Planned Future Series

    In the future I hope to start up more series on my channel, including ones for other sandbox-type games. I’m considering buying Terraria, TerraTech and/or Scrap Mechanic, as those 3 games look pretty fun and interesting from what I’ve seen so far. I also intend to start a singleplayer custom modded series in 1.8 featuring a lot of mods I’ve found that I think are pretty neat.

    And so those are my plans for the current and upcoming series on my YouTube channel! I hope you all enjoy my upcoming videos, and if you do, then please make sure to leave a like, share them with your friends, and post your thoughts and feedback in the comments section! (And maybe also subscribe if you really really really like my videos!)

  • Colore: My First Minecraft Mod

    Colore: My First Minecraft Mod

    I’ve been working on this since I started my YouTube channel, and only now has it finally been officially launched. The Colore Mod, my first Minecraft mod. It really is a fairly simple mod, but it has taught me a lot about how the Minecraft code works, and given me some good practice in Java. I have a lot of ideas for things that could be added in the next update, including slabs, stairs, fences, doors, bows, shields, and transparent-colored blocks and panes, so this initial release is only the beginning.

    This mod actually started out as a very basic idea, however. I was originally only making the mod to learn the very core basics of Minecraft modding, and so “SuperGeniusZeb’s Colored Blocks Mod”, as I called it, would only add 16 colored blocks, 16 essences, the 6 ores, and the 6 unrefined essences. The 16 colors would have been the same ones used across Minecraft’s colored blocks like stained glass, stained clay, and wool: red, orange, yellow, lime, green, cyan, light blue, blue, purple, magenta, pink, white, light gray, gray, black, and brown. Having accomplished this, though, I became unsatisfied with the limited range of colors, and decided to not base my mod’s color palette off of the standard vanilla Minecraft multi-color blocks. Instead I decided to go with a total of 14 colors: red, reddish orange, orange, orangish yellow, yellow, yellowish green, green, cyan (greenish blue), blue, indigo (bluish purple), purple, magenta (purplish red or reddish purple), brown, and grayscale (which represented white, black, and the shades in between). I decided that each of the base colors would have 5 shades: normal, light, lighter, dark, and darker, and this made there a total of 70 different colors. I chose 5 shades because I thought 3 shades would miss out on some useful variations of colors, and because 7 or more shades would be too difficult to distinguish, and also rather superfluous. I then decided that each of the 14 base colors would be its own block, using metadata to distinguish between the 5 shades. I considered doing the reverse and having 5 blocks for each of the shades, with the metadata being used to determine the color. I chose not to do this, however, because that would use up 14 of the 16 possible metadata states, and I wanted to leave plenty of room in the metadata of each block for future changes and additions. (Maybe when I add slabs, the double/full slab blocks will just be the regular blocks with metadata that makes them drop slabs instead of full blocks.)

    And that’s when things got difficult. Being totally inexperienced in the field of Minecraft modding, I got confused when trying to add metadata to the blocks, and my code, which was honestly sort of a mess to start with, became messier. From a lack of comprehension of some of the standard practices and concepts of modding to countless numbers of silly errors like creating but never actually calling important functions, I just got really confused, and took a break from trying to code the mod because of how frustrated I got. Having jumped from one tutorial to another, all of which seemed to teach different ways of doing different things, I wasn’t really sure what to do, and at the time I still didn’t quite understand what exactly those tutorials were teaching.

    Eventually though, I decided to basically clean-wipe my code and start from scratch, reworking the organization of the packages and the naming of the classes to fit my desired style, and I finally figured out some of the things I simply didn’t understand before, and soon the mod’s percentage of completion began to rapidly increase, and soon it was only a matter or copying-and-pasting and finding-and-replacing of some JSON model files before my mod was finished. By , the mod was complete, and it was only a matter of promoting it and getting it published and uploaded everywhere.

    That took a while. I wanted to have my website up, running, and fairly polished before I released the mod, and I also had to take all the screenshots and make a cool release trailer. After various delays and lots of time spent, I finished my website, took all the pictures, and finished the trailer. Then it was just a matter of uploading the trailer to my YouTube channel and posting my mod to the various Minecraft mod sites and forums.

    And so finally, the Colore mod is now officially released to the public! I hope to continue working on the mod and keeping it up-to-date with the latest Minecraft Forge releases, as well as make some other mods as well. Maybe a chocolate mod? Hmmm…

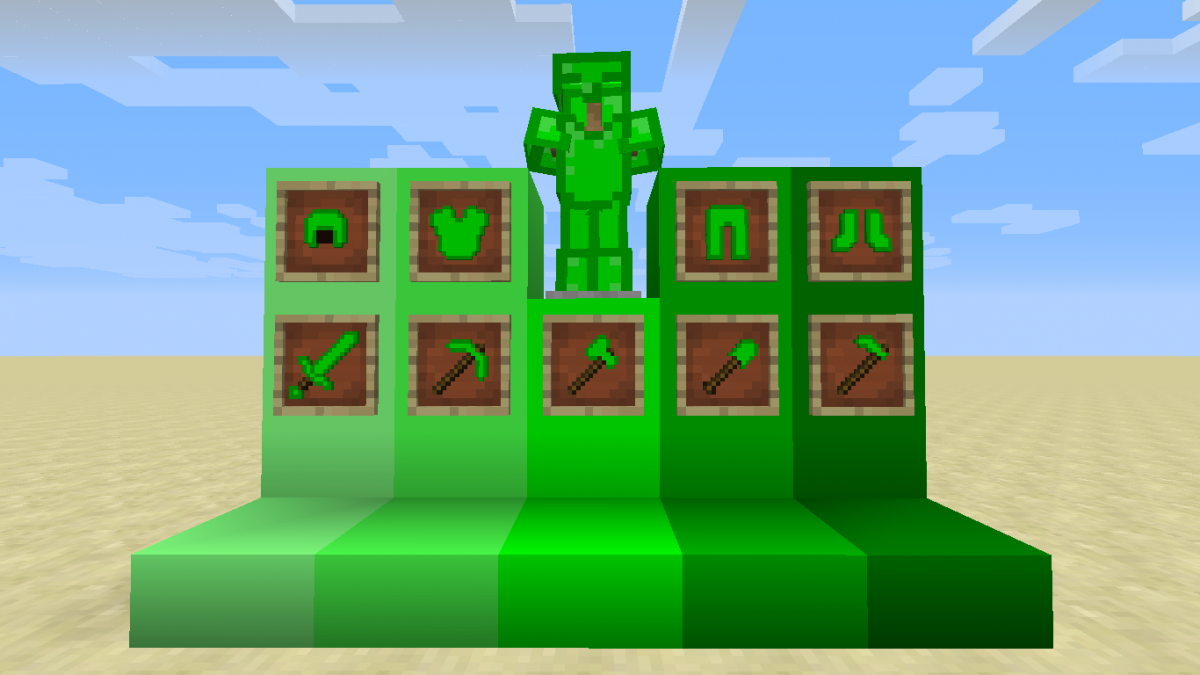
    Oh, and by the way, the picture above is what happened when I made a silly mistake in adding the armor models. I mixed up the assets\colore\models folder with the assets\colore\textures\models folder, and broke every texture except the armor model textures. 😛